BetterGraphics Mod – An Installation Tutorial
BetterGraphics Mod – An Installation Tutorial
1 year 2 months ago - 1 year 2 months ago
Seems there are others like me who had some challenges to install the BetterGraphics mod.
For me it took several attempts to make it. I think I’ve got it right now.
So to make the installation procedure a little bit clearer I made a tutorial with more steps and detailed information.
Please, anything about this tutorial, if I have done some odd choices or right out wrong, tell me so I can rectify any faults as soon as possible.
My setup may differ from yours so below are some information about my game setup.
I run the GOG version of the Independence War™ 2: Edge of Chaos in Windows 10.
The mods I at this point run together with the BetterGraphics mod are; Multimod, UniGUI, EoC Community Patch - 22 September 2022, EoC NoCD Patch - 22 November 2023 and Mouse Flight.
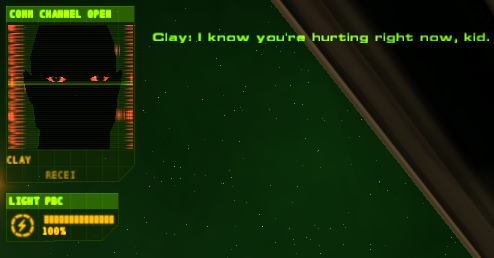
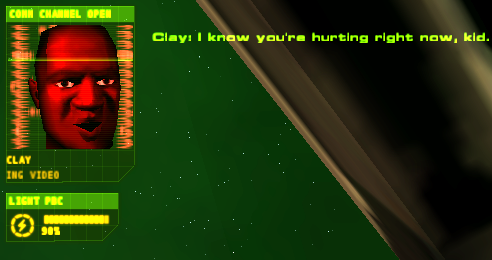
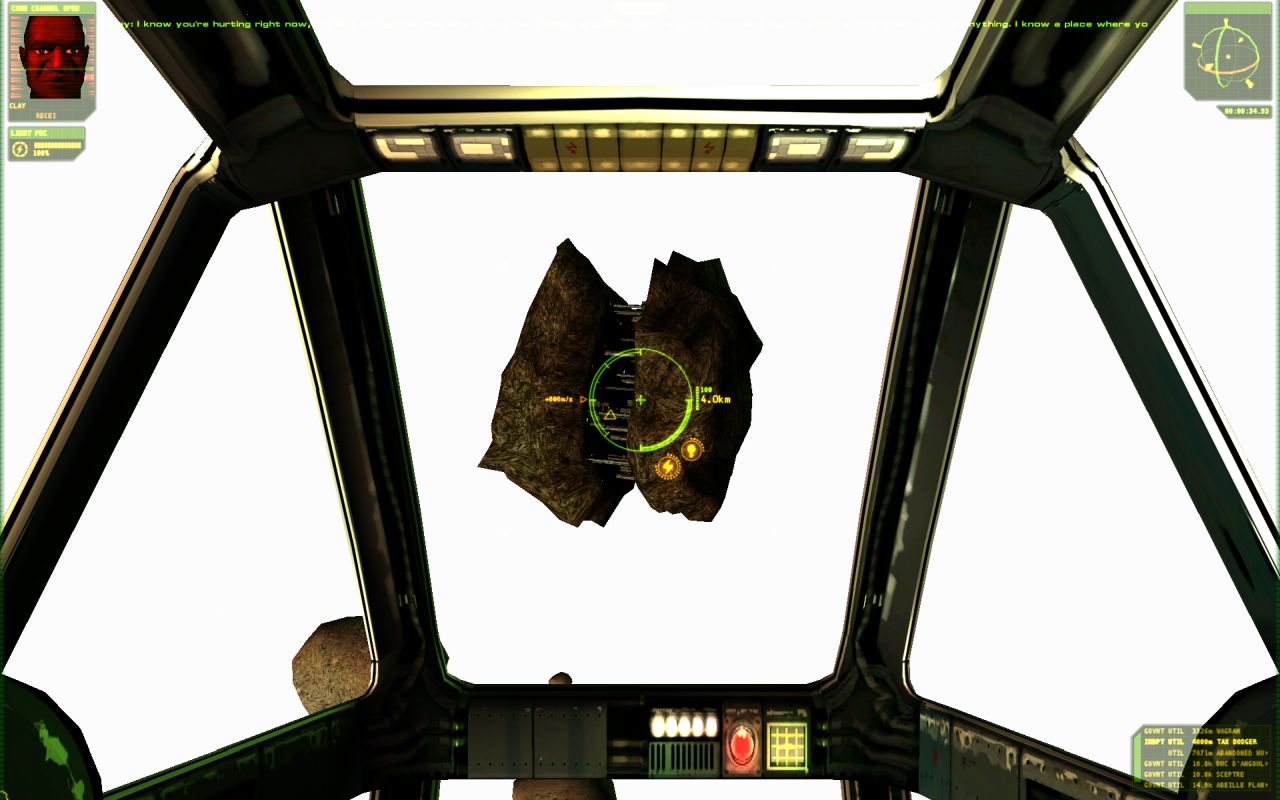
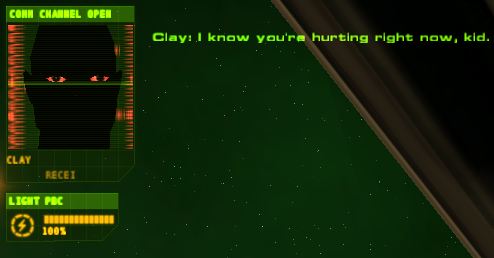
I got this small issue, did this happen to you?
Poor Clay, what have we done…
It seems to be a result of Clays Avatar folder (suggested tinkering below).
Let’s begin…
Step 1.
1.1. Place the whole BetterGraphics folder in the directory “…\Independence War 2\mods”.
1.2. Move the files within the folder "Put the content of this folder directly in your game folder\bin\release" to the directory “…\Independence War 2\bin\release”.
Step 2.
2.1. Run “Install as directx10 by locating your loader exe.exe”
2.2. At “Select a game or application:” select “Loader (loader.exe)” (If it’s not listed it can be found at the direction “…\Independence War 2\bin\release”), then hit “Next”.
2.3. At “Select the rendering API Loader uses:” select “DirectX 10/11/12”, then hit “Next”.
2.4. “Browse” to the directory where you have "BetterGraphics" folder and choose the file “Reshade settings Independence War 2_ Edge of Chaos.txt”, then hit “Next” and you are done with step 2.
Step 3.
3.1. Run “Run this (p)rogram to update your loader exe.exe”.
3.2. You will be directed to the “…\Independence War 2\bin\release” folder.
3.3. Choose the "loader.exe" file and "Open" it. You get a confirmation, hit "OK" and you are done with this step.
Step 4.
4.1. Go to “…\Independence War 2\bin\release” folder.
4.2. Start the “dgVoodooCpl.exe” program.
4.3. Open the tab “DirectX”.
4.4. Find the “Antialiasing (MSAA)” box and make sure it’s set to “Off”, hit "OK" and this step is done.
Step 5.
5.1. Open the “flux.ini” file in “…\Independence War 2”.
5.2. Find the “[FcDetailSwitchNode]” line.
5.3. Change to following values:
global_detail_scale = 2.9
cull_detail = 0.0005
box_detail = 0.0005
5.4. Save your changes, close the file and…
Now you are ready to play with BetterGraphics, enable it in the game and enjoy.
If you want to keep Clay’s sweet face the immediate fix is to go to BetterGraphics folder, then open the avatars folder and remove the Clay folder from there.
Now, that’s much better…
Hope this tutorial will be to some help.
Now, have an exciting time when navigating through the vast space.
Regards, ErikS.
Please Log in or Create an account to join the conversation.
Re: BetterGraphics Mod – An Installation Tutorial
1 year 2 months ago
Well that certainly is a better and more precise version of my reader, mind if I copy it to the mod ?
Please Log in or Create an account to join the conversation.
Re: BetterGraphics Mod – An Installation Tutorial
1 year 2 months ago Alalkelele.
Happy to hear you like it.
And thank you for your work to make this mod.
Absolutely, go ahead and use it.
Additionally, may I ask?
The little fix with Clays face, is just a fix, it doesn’t really solve the problem.
It could be similar issue with other avatars.
I saw that young Cal looks quite saturated with dark portions as well, not as bad as Clay though.
Is this something you can look into and rectify?
Regards, ErikS
Please Log in or Create an account to join the conversation.
Re: BetterGraphics Mod – An Installation Tutorial
1 year 2 months ago
Sure, if I was able to reproduce the bug.
I will upload a new version of my reshade setting, let's see if it fixes the problem. Welllllll, can you try to turn on off reshade, does that correct it ?
I will upload a new version of my reshade setting, let's see if it fixes the problem. Welllllll, can you try to turn on off reshade, does that correct it ?
Please Log in or Create an account to join the conversation.
Re: BetterGraphics Mod – An Installation Tutorial
1 year 2 months ago - 1 year 2 months ago
Hello Alalkelele.
Okay, I have done some tinkering…
BetterGraphics –Step by Step testing
Fresh install of the game with registry purged from game related files.
First…
Added mods, Multimod, UniGUI, NoCD Patch, EoC Community Patch, Mouse Flight.
All works fine up to resolution 1920 x 1200.
Second…
Added BetterGraphics Folder to mods.
Game runs up to 1920 x 1200, but with white background.
Third…
Updated the loader.exe and changed the recommended flux.ini values.
Game runs up to 1920 x 1200, but with white background.
Fourth…
Added only dgVoodoo2.exe and related .dll files, no ReShade files and folders.
Made necessary settings in dgVoodoo2.exe.
Game runs up to 2560 x 1600, background is back, Clay is black not red.
Fifth…
Removed dgVoodoo2.exe and related files without resetting resolution settings.
Game won’t start.
Sixth…
Restored dgVoodoo2.exe and its related files. Game runs. Set the game back to 1920 x 1200. Removed dgVoodoo2.exe and related files.
Game runs, but with white background, Clay is as he should be.
Seventh…
Did all the ReShade settings, added the Reshade settings Independence War 2_ Edge of Chaos.txt file and the ReShade files found in BetterGraphics\Put the content of this folder directly in game folder\bin\release folder, but no dgVoodoo2.exe and related .dll files.
Game runs up to 1920 x 1200, but with white background, Clay is as he should be.
Eighth…
All in BetterGraphics.
Game runs fine, but Clay is black not red.
Ninth…
Deactivate BetterGraphics in Extras.
Game runs fine, background and Clay are fine, max resolution 2560 x 1600.
Summary…
So it still seems that when the avatar folder is not affecting the game, all is good.
Looks fun, doesn’t it.
And you don’t get this odd hiccup as I do?
Wonder if there is something I have installed on my laptop, for example I got this X-Rite Color Assistant bundled with it, can that be an issue.
I tried running the game with X-Rite Color Assistant shut down but with no change.
Anything else you want me to try?
Now it’s time for a drink.
Okay, I have done some tinkering…
BetterGraphics –Step by Step testing
Fresh install of the game with registry purged from game related files.
First…
Added mods, Multimod, UniGUI, NoCD Patch, EoC Community Patch, Mouse Flight.
All works fine up to resolution 1920 x 1200.
Second…
Added BetterGraphics Folder to mods.
Game runs up to 1920 x 1200, but with white background.
Third…
Updated the loader.exe and changed the recommended flux.ini values.
Game runs up to 1920 x 1200, but with white background.
Fourth…
Added only dgVoodoo2.exe and related .dll files, no ReShade files and folders.
Made necessary settings in dgVoodoo2.exe.
Game runs up to 2560 x 1600, background is back, Clay is black not red.
Fifth…
Removed dgVoodoo2.exe and related files without resetting resolution settings.
Game won’t start.
Sixth…
Restored dgVoodoo2.exe and its related files. Game runs. Set the game back to 1920 x 1200. Removed dgVoodoo2.exe and related files.
Game runs, but with white background, Clay is as he should be.
Seventh…
Did all the ReShade settings, added the Reshade settings Independence War 2_ Edge of Chaos.txt file and the ReShade files found in BetterGraphics\Put the content of this folder directly in game folder\bin\release folder, but no dgVoodoo2.exe and related .dll files.
Game runs up to 1920 x 1200, but with white background, Clay is as he should be.
Eighth…
All in BetterGraphics.
Game runs fine, but Clay is black not red.
Ninth…
Deactivate BetterGraphics in Extras.
Game runs fine, background and Clay are fine, max resolution 2560 x 1600.
Summary…
- With the loader.exe update at certain setups I got white background
- With dgVoodoo2 added game runs at higher resolution but Clay is not himself.
- With ReShade but no dgVoodoo2 game runs but with white background and Clay is himself.
- With ReShade and dgVoodoo2 game runs fine but Clay is not himself.
- With the BetterGraphics mod deactivated, all is fine but probably the game is still running with the settings from ReShade and dgVoodoo2.
So it still seems that when the avatar folder is not affecting the game, all is good.
Looks fun, doesn’t it.
And you don’t get this odd hiccup as I do?
Wonder if there is something I have installed on my laptop, for example I got this X-Rite Color Assistant bundled with it, can that be an issue.
I tried running the game with X-Rite Color Assistant shut down but with no change.
Anything else you want me to try?
Now it’s time for a drink.
Please Log in or Create an account to join the conversation.
Re: BetterGraphics Mod – An Installation Tutorial
1 year 2 months ago
Can you tell us your machine specs ? OS, GPU, CPU etc..
Please Log in or Create an account to join the conversation.


